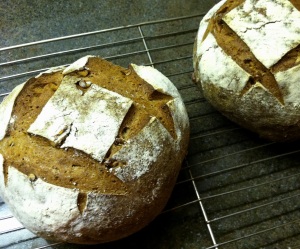
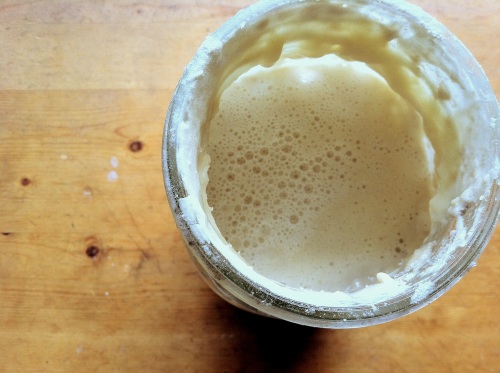
My sourdough starter turned one last month.
This is the third or fourth starter I’ve made, and the only one to last longer than a few months. So obviously I’m doing something right—but it took a few years of trial and error to get here.
Building a sourdough starter is easy; keeping it going is a little harder, especially if you don’t have time to bake every few days. But once you’re attuned to all the variables that can make your starter too sour or not sour enough, too bubbly or not bubbly at all, you’ll wonder how you ever relied on commercial yeast to make bread.
There are several ways to build a sourdough starter, but the technique that I’ve settled on as the most reliable comes from Dan Lepard’s “The Handmade Loaf.” He outlines a 5-day build that utilizes the natural yeasts found on fruit skins, the lactic bacteria in live-culture yogurt, and a little kick-start from rye flour:
Day 1:
1/4 C water at room temp.
2 t rye flour
2 t bread flour
2 t currants or raisins, organic (I’ve also used just-picked organic grapes to good effect)
2 t live culture yogurt
Mix all in a jar and leave at room temperature (68-72°) for 24 hours.
Day 2:
1/4 C water at room temp.
2 t rye flour
2 t bread flour
Stir in and leave at room temperature for 24 hours.
Day 3:
1/2 C water at room temp.
4 t bread flour
4 t rye flour
Stir in and leave at room temperature for 24 hours.
Day 4:
1/2 C water at room temperature
1 C bread flour
Remove 3/4 of the mixture and add the water. Pour through a tea strainer to remove the raisins, then put back in the jar and stir in the flour. Leave at room temperature for 24 hours.
Day 5 and onwards:
1/2 C water at room temperature
1 C bread flour
Remove 3/4 of the mixture before all feedings.
What’s happening in your jar
Yeast are the first colonizers of your wild starter. If you feed your starter at a high proportion and do not let it ferment very long (12-24 hours), your starter will have good lift but not much sour flavor. Lactic bacteria move in second, and they are what gives your starter a sour flavor–though this can easily shift to vinegary if you’re not careful. If this happens, you can generally save the starter by providing it frequent high proportion feedings, and holding it at a cooler temperature. The more sour your starter, the less lift it generally has.
By high proportion feedings, I mean that you should remove almost all of the starter in the jar and replace it with a large amount of flour and water. This helps to rebalance the yeast/bacteria community.
You can adjust the flour/water ratio to your preference; drier mixtures will ferment more slowly and will have more structure to hold in the yeast. I typically feed at about a 1:1 ratio.
Storage
I keep my starter in a quart jar covered with a cloth napkin held in place with elastic. You want to make sure you cover your starter with something permeable to the air so the wild yeasts can get in easily. I find that my starter needs to be held at a fairly low room temperature to get the flavor and activity I’m looking for: generally no higher than 70 degrees. In between uses, I keep it in the fridge, and always feed it freshly right before chilling it. Take it out of the refrigerator several days before you want to use it and feed it at a high proportion daily for 2-3 days.
You can also hold your starter in the freezer during long hiatuses. Be sure to transfer it into a freezer-safe container with enough room to expand. Defrost at room temperature and start feeding immediately. It may take a few weeks of regular feeding to build it back to the flavor you want, but have confidence that it will come back.
A word about flours
Different flours will change the taste and activity level of your starter. Rye flour produces a very active starter. This is a good way to jump-start your culture but also means you need to be more vigilant if you choose to feed exclusively with rye.
You can make your starter 100% all-purpose flour, 100% whole wheat flour, 100% rye flour, or any combination–it just depends on what you’re going to put it in. You can always transition your starter into a different flour type by primarily feeding it a different kind of flour for a few days. If I’m feeding my starter white flour, I use bread flour, which has a higher gluten content than all-purpose flour. This gives your starter, and hence your dough, a little more structure.
When building a starter for a rye bread, you may want to consider using bread flour, since rye has a much lower gluten content than wheat. But if your goal is 100% rye bread, transition your starter with rye for a few days beforehand.
Now your turn…
Working with wild creatures is never easy, yeast and bacteria included. Your starter may not always smell sweet and fresh. Your bread will not always rise. And that’s okay–that still happens to me. It even happens in commercial artisan bakeries. And every time it does happen, I learn a little more about time and temperature, and about patience and discipline, and my starter and I get a little better about communicating with each other. Here’s to many more years of a beautiful relationship.


I love this and I love your blog! Would it be ok, if I pin this?
Sure! Glad you enjoy it!